Create Menu Screen
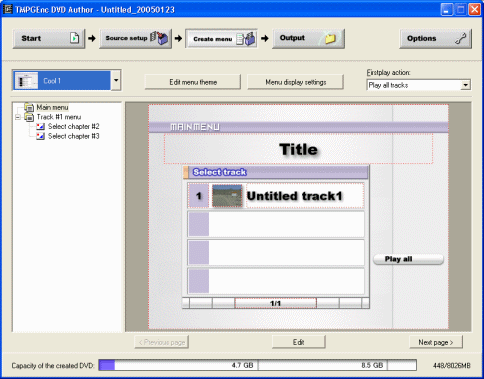 TMPGEnc DVD Author allows you to create a pretty good menu. The window itself is easy enough to understand. First of all you see the drop down box that allows you to switch between themes you would like to use for your Menu. Beside this are two buttons, Edit menu theme and Menu display settings. Then you have the Firstplay action which you select what will first be played on the DVD whether it will be the menu or the tracks. At the left side underneath the theme drop down box there is the structure of the menu. Many of the TMPGEnc DVD Author themes will add menu pages for chapter selection also. Beside this you have your area to edit your menu.
So the first thing you have to do is select either No Menu in the theme drop down box or select a theme or of course create a new theme yourself. The menu editing is done easily, you can select a background image very easily by clicking on the background, you can choose anything like a BMP or JPEG file. Make sure that its filesize is about 352x240, 352x288, 704x480 or 704x576 to prevent a distorted background. If you don't like the themes they offer, then try going to the drop down box and selecting New theme.
Creating a New theme
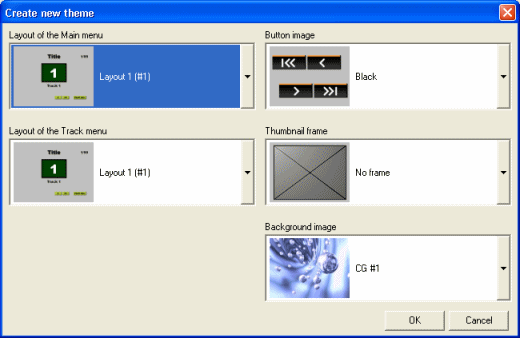 Creating a new theme is quite easy. First thing you have to do is select the layouts of the Main menu and the Track menu's. You have many different layouts to choose from. You can choose the button image too, you have 8 different choices. A thumbnail frame is completely optional, you have 16 different choices for one. You can choose between 15 different background images also, you can change the image later on to whatever you want.
Edit Menu Theme
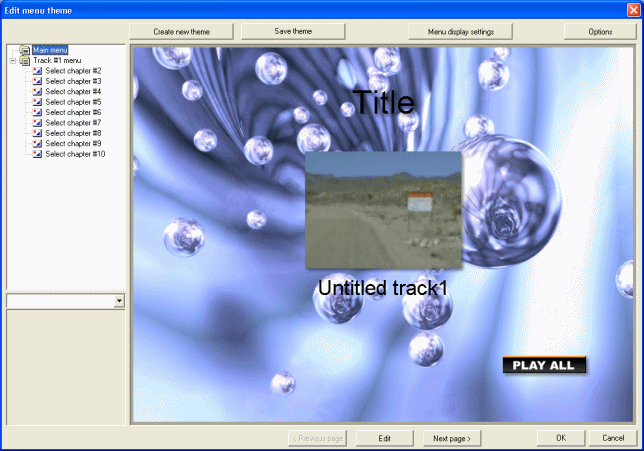 On the Create Menu page there is the Edit Menu Theme button. With this you can edit your Menu theme by rearranging thumbnails, titles and text. To change Text and font details double click on the text and you will get a little pop up box. You can change thumbnail images by double clicking on the thumbnail and moving the slider through the video stream. To change the menu double click on the menu under the track list on the left.
After you have done all the editing you want to do you can go to the Menu display settings. You can also get to these settings through the button on the Create Menu screen. Go to the Menu display settings now.
Menu display settings - General
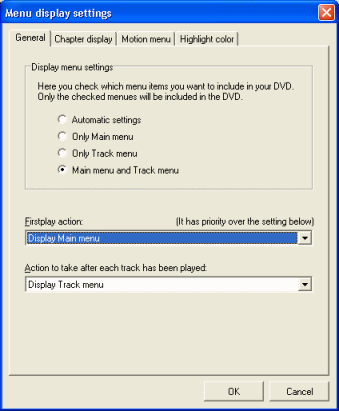 The first General settings are quite easy. The Display menu settings have four different options and you have to pick one. You will be choosing what menu items you want on your DVD. If you choose Automatic settings the most appropriate menu's will be selected only to be put on the DVD. Only main menu will have just the main menu's and not the track menus. Only track menu will have the track menus and not the main menu. Main Menu and Track Menu will contain both menu's. Firstplay action lets you choose if you want the menu to be played first, or the first track only or all tracks. Then you have the Action to take after each track has been played, usually its good to leave it at Display Track menu. The next tab is chapter display and it allows you to select what chapters you want to appear on the DVD, it doesn't require a screenshot as its straight forward, you can just untick any chapter. So we will go straight to motion menu now. Click the Motion Menu tab.
Menu display settings - Motion Menu
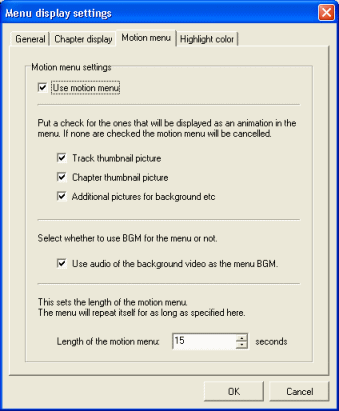 If you want a motion menu then you have to tick the Use Motion Menu tickbox. The next three settings lets you choose what will be animated on the motion menu. Your choices are Track thumbnail picture, Chapter thumbnail picture and Additional pictures for background etc. If none are selected then the motion menu will be cancelled. The next part lets you choose to use audio of a background video as the menu background music. The last part lets you choose what the length of the motion menu will be, the longer the length the bigger the filesize will be on the DVD. The next tab lets you choose what colour you want when you have buttons selected. If you are using Video files for a motion menu you will need to use MPEG-1 or MPEG-2 standard files. It's very straight forward and doesn't require a screenshot. We can now go from here straight to the Output window.
Written by: James Delahunty

